Printing Your Bluelines: Watercolor Basics
This is the process I use for standalone illustrations as well as my 7" Kara comic pages. It involves printing out digital bluelines onto watercolor paper using a desktop printer. This process is my secret weapon- without it, I wouldn't be able to produce watercolor comic pages, and certainly not in the numbers necessary for a longform comic like 7" Kara. This is also the same process I use for printing out bluelines for inked pieces, so it's a really versatile technique for comic artists and illustrators!
If you're a stamper or cardmaker, this technique is still relevant to you! You can print your digistamp onto whatever paper you like, then opt to either pencil over it, or ink it with a waterproof technical pen or brushpen.
If you're a stamper or cardmaker, this technique is still relevant to you! You can print your digistamp onto whatever paper you like, then opt to either pencil over it, or ink it with a waterproof technical pen or brushpen.
I know the idea of printing out your bluelines for watercolor may come across as totally foreign to many of you. This process was introduced to me by Heidi Black, and I'm using the materials she originally recommended as well. I've had great results with this process over the years, and have used it to print 7" Kara pages since Chapter 1. If you doubt my results, simply check my comic out, or check out my Instagram for unaltered photos of in process pages.
If you enjoy this watercolor process, you should check out Heidi's art and tutorial book- ElectricAbyss: The Art of Heidi Black. It's full of great art tutorials.
 |
| Example of a stretched comic page |
Materials:
Cellulose or Cotton Rag watercolor paper- mould made is best (handmade tends not to run through a printer very well.
Papers I've tried:
Canson Moulin du Roy
Canson L'Aquarelle Heritage
Langton Prestige
Canson Biggie Watercolor
Winsor and Newton Watercolor Marker Paper
Fluid EZ Block coldpress watercolor paper (removed from the block)
Strathmore 400 Series Watercolor paper
Cheap Joe's Kilimanjaro Coldpress
The ideal paper comes in fairly standard sizes, on tape bound pads. If you're using block bound watercolor paper, you will have to remove the paper to run it through the printer.
Home printer that uses inkjet ink
(Basically anything but a toner printer will work for this)
I use a Canson Pixma Pro 9000 MK II- it's a large format photo printer that can handle thick watercolor papers quite well
Creating Your Bluelines:
I did a tutorial in Intro to Comic Craft on turning your roughs into bluelines and printing them, so I recommend checking out this post for those settings!
Creating Your Bluelines:
I did a tutorial in Intro to Comic Craft on turning your roughs into bluelines and printing them, so I recommend checking out this post for those settings!
Prepared Bluelines
Print Settings I find helpful:
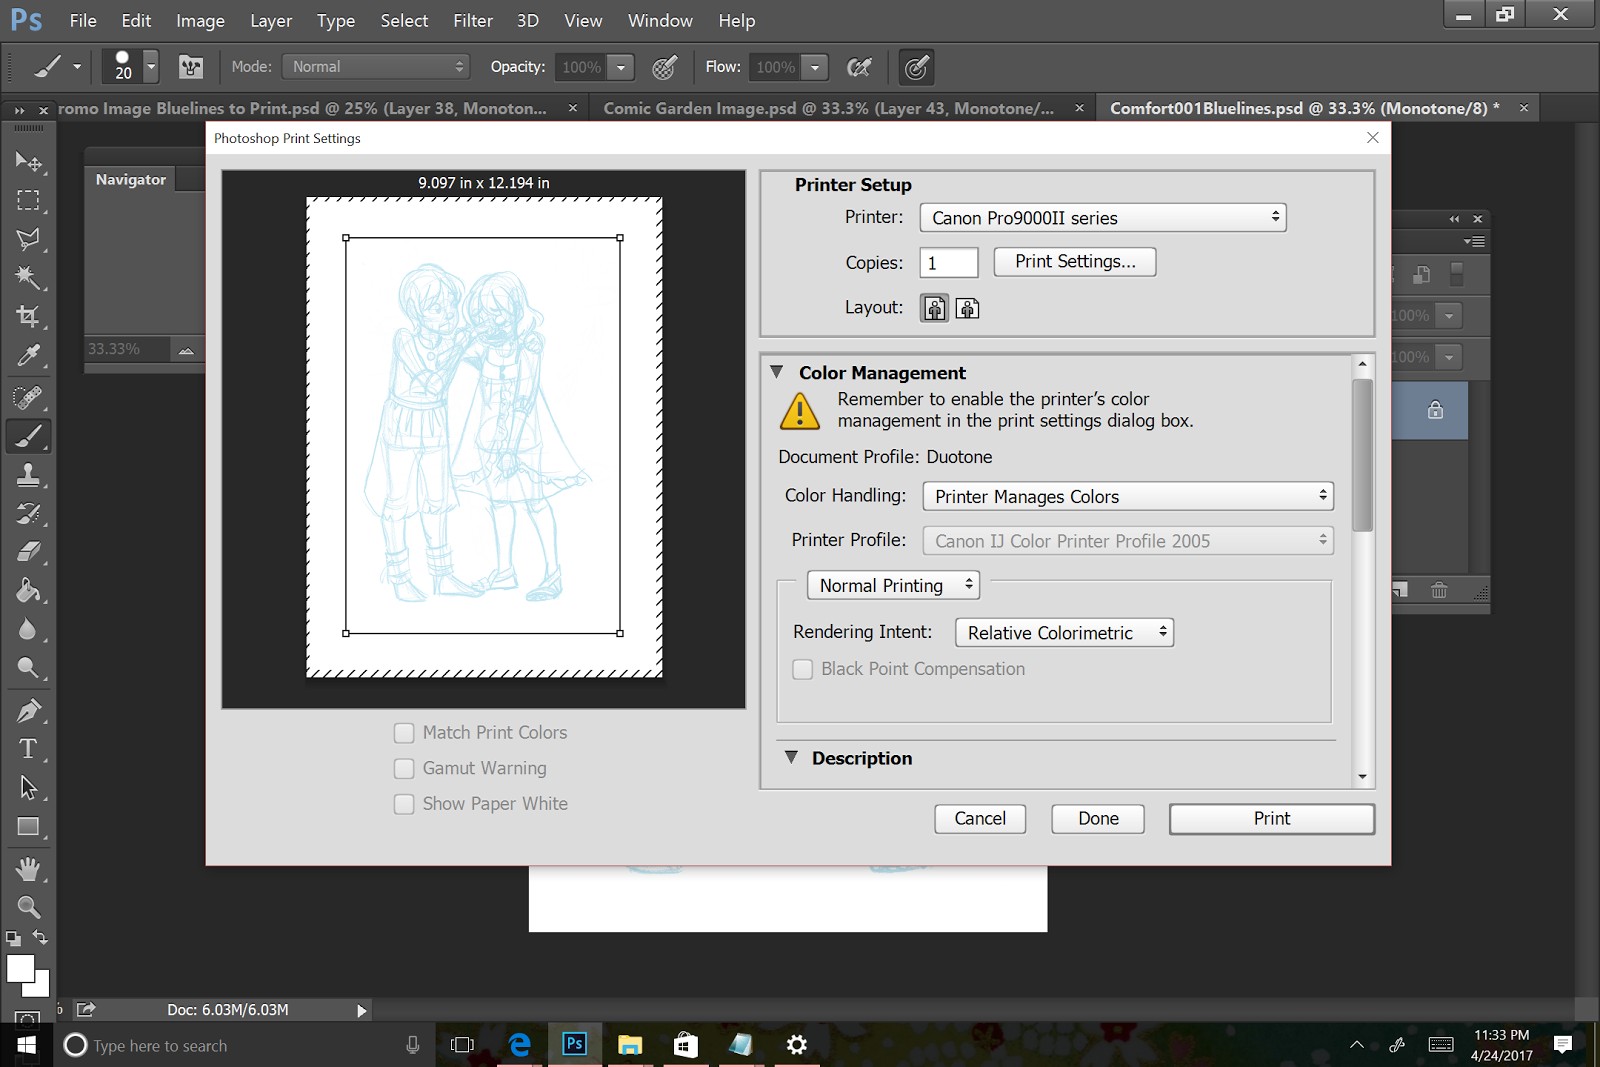
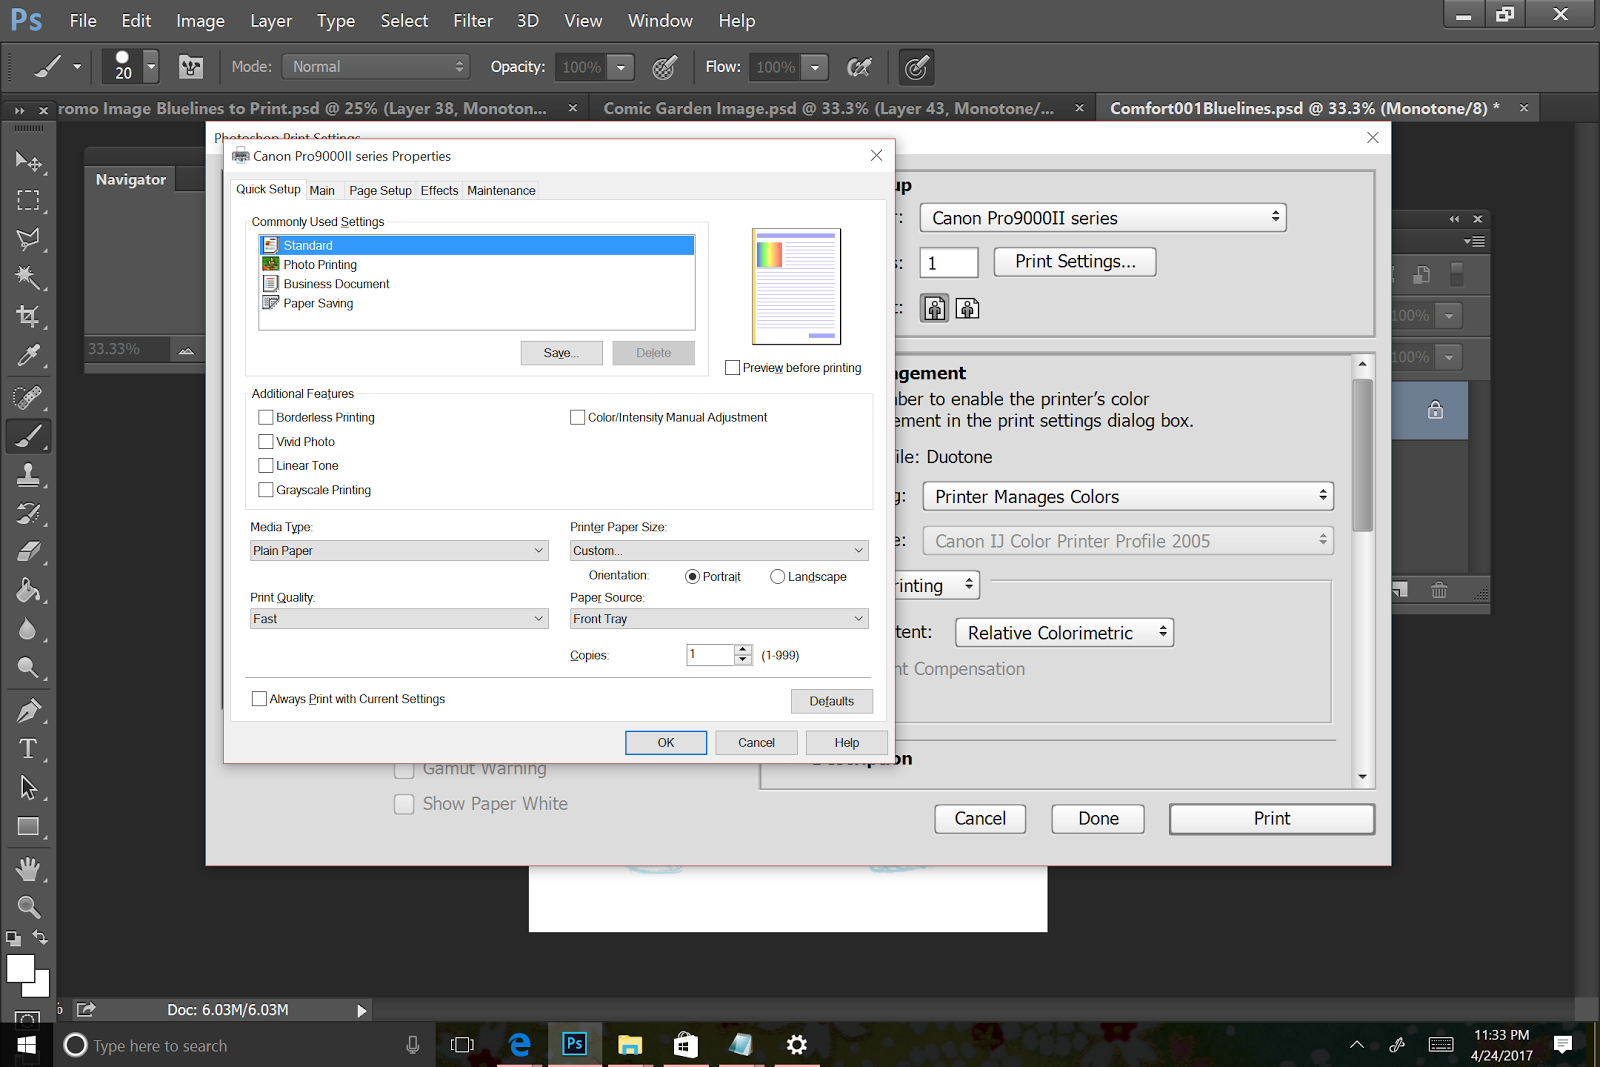
For the Canon Pixma Pro 9000 MK II, you want to select front tray (paper loads from the front of the printer) as it allows the printer to print the page entirely flat. This is great for heavier papers like 140lb and 300lb watercolor paper.
For printing on watercolor paper, I want my bluelines as light as possible, so I select 'plain paper' and 'fast' print quality.
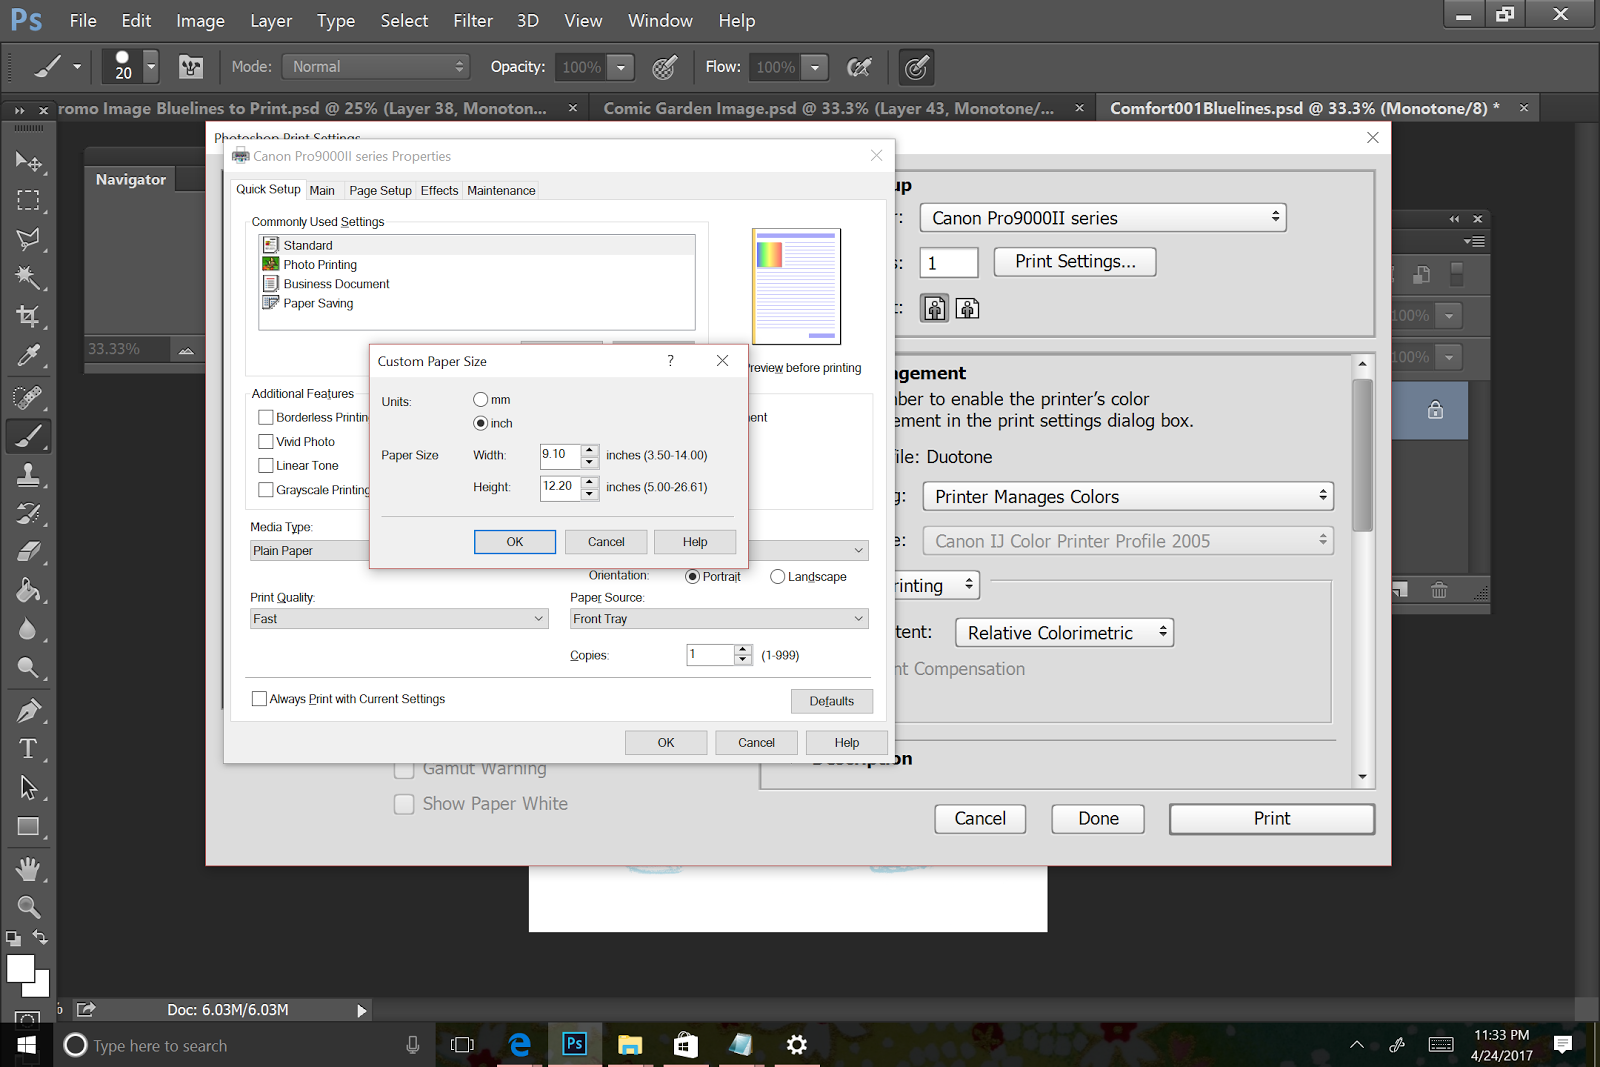
Watercolor paper often comes in non-standard sizes, so you'll need to select Custom and input your paper's size before printing.
Printing Your Pages
Intro to Comic Craft- Printing Cicada Summer Bluelines:
Once your pages have been printed, you're going to need to decide how to formalize your lines. The dye based printer ink will wash away once you stretch your pages, so you either need to pencil your lineart or ink your lineart.
When stretching your watercolor paper:
Stretching Demonstration (with printed bluelines):
Disappearing Bluelines Tutorial
Demonstration of Printed Bluelines
Once your pages have been printed, you're going to need to decide how to formalize your lines. The dye based printer ink will wash away once you stretch your pages, so you either need to pencil your lineart or ink your lineart.
When stretching your watercolor paper:
- Apply water to back side, dab off with paper towels
- Apply water quickly to front, dab off with paper towels (to remove blue dye)
- Apply water to front, dab off with paper towels
- Continue as normal.
Stretching Demonstration (with printed bluelines):
Disappearing Bluelines Tutorial
Demonstration of Printed Bluelines
Keep in mind that once you apply water to your paper, the bluelines will dissolve, so you will want to either pencil or ink your bluelines in order to preserve your lineart. Keep an eye out for an tutorial on penciling your watercolor lineart in the near future!
Comments
Post a Comment